| Welcome to Sprocket School! This project is maintained by volunteer editors. Learn more about how this works. |
Cues: Difference between revisions
Jump to navigation
Jump to search
JesseCrooks (talk | contribs) |
|||
| (8 intermediate revisions by 2 users not shown) | |||
| Line 4: | Line 4: | ||
'''Click to enlarge:''' | '''Click to enlarge:''' | ||
<gallery widths=225px heights=225px mode=packed> | <gallery widths=225px heights=225px mode=packed> | ||
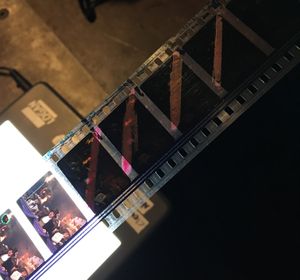
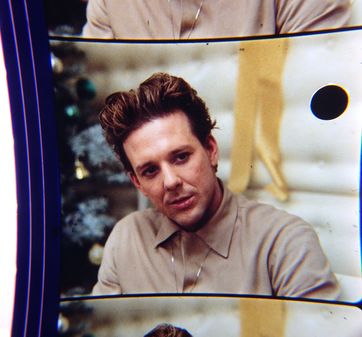
File:Scratchcue.jpg| '' | File:Scratchcue.jpg| ''scribe cue'' | ||
File:handdrawn_cue.jpeg| ''hand drawn cue'' | |||
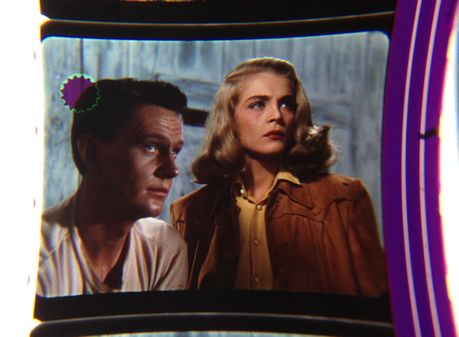
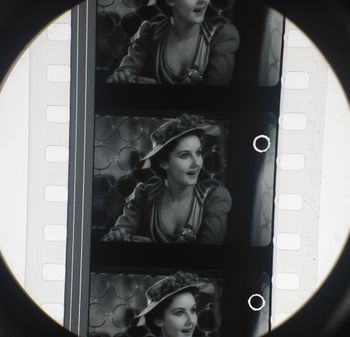
File:Desert fury.jpg| ''technicolor lab cue'' | File:Desert fury.jpg| ''technicolor lab cue'' | ||
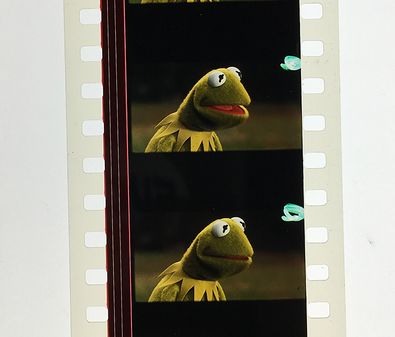
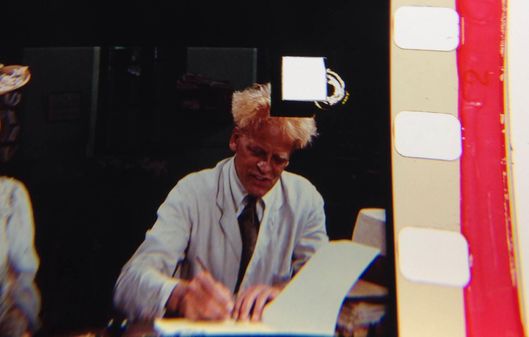
File:Diner.jpg| ''typical lab cue'' | File:Diner.jpg| ''typical lab cue'' | ||
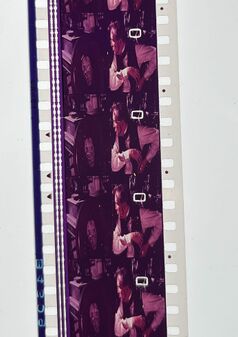
File:punch cue.jpg| ''square punch cue'' | File:punch cue.jpg| ''square punch cue'' | ||
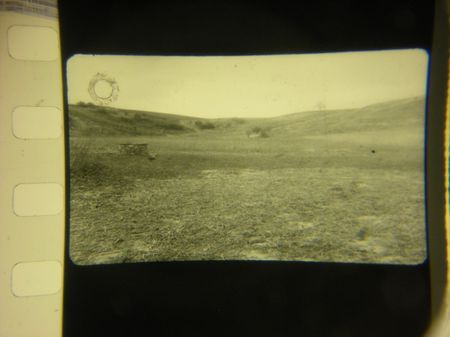
File:The_Road_back.JPG| '' | File:The_Road_back.JPG| ''scribe cue'' | ||
File:Cuemaker2.jpg| ''tool for making | File:Square_cues.jpg| ''square cue'' | ||
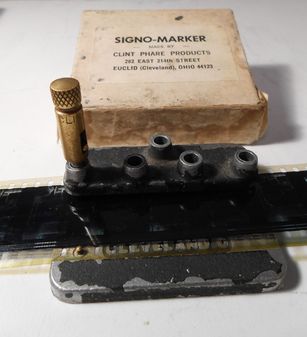
File:Cuemaker2.jpg| ''tool for making scribe cues'' | |||
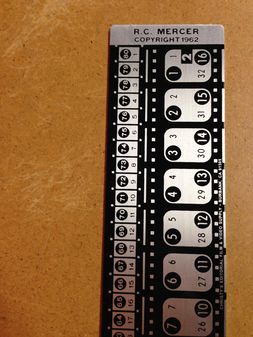
File: Film ruler.jpeg| ''Mercer 16mm/35mm film ruler, available at [http://www.christys.net/ Christy's]'' | File: Film ruler.jpeg| ''Mercer 16mm/35mm film ruler, available at [http://www.christys.net/ Christy's]'' | ||
File:Cement click cue.JPG| ''cement click cue'' | File:Cement click cue.JPG| ''cement click cue'' | ||
| Line 38: | Line 40: | ||
*If a film has been previously cued but say the changeover cue has been spliced off, you may want to count back less than 18 frames to avoid clipping anymore of the film than you have to. I would say 10 at the minimum to avoid having a pretty bad changeover. | *If a film has been previously cued but say the changeover cue has been spliced off, you may want to count back less than 18 frames to avoid clipping anymore of the film than you have to. I would say 10 at the minimum to avoid having a pretty bad changeover. | ||
*Making cues on a fade out: If there’s no splice to help you, look for when the audio ends and use your best judgement. There should be a lab splice or a splice from the negative that you can count back 172 frames from so you can mark your motor cue. You won't need to make a changeover cue, because the fadeout itself will be your cue. Don't forget to use your ears as sometimes audio will continue after the image fades out! | *Making cues on a fade out: If there’s no splice to help you, look for when the audio ends and use your best judgement. There should be a lab splice or a splice from the negative that you can count back 172 frames from so you can mark your motor cue. You won't need to make a changeover cue, because the fadeout itself will be your cue. Don't forget to use your ears as sometimes audio will continue after the image fades out! | ||
[[File:Bad grease cues.JPG| | [[File:Bad grease cues.JPG|right|thumb|300px|Incorrectly made grease cues (too large, marked on emulsion side, and lab cues were perfectly fine at only 18 frames from the end!)]] | ||
[[File:Bad grease cues 2.jpeg|center|thumb|300px|So bad! Very very bad!]] | [[File:Bad grease cues 2.jpeg|center|thumb|300px|So bad! Very very bad!]] | ||
==Related Articles== | |||
*[[Foil cues]] | |||
*[[Changeover]] | |||
| Line 47: | Line 55: | ||
[[Category:Film handling]] | [[Category:Film handling]] | ||
[[Category:Film prints]] | [[Category:Film prints]] | ||
[[Category: Technique]] | [[Category:Technique]] | ||
[[Category: Showmanship]] | [[Category:Showmanship]] | ||
Latest revision as of 09:28, 16 October 2024
Different Types of Cues and Cue Making Tools
Click to enlarge:
-
scribe cue
-
hand drawn cue
-
technicolor lab cue
-
typical lab cue
-
square punch cue
-
scribe cue
-
square cue
-
tool for making scribe cues
-
Mercer 16mm/35mm film ruler, available at Christy's
-
cement click cue
Countdown
see also: Leader
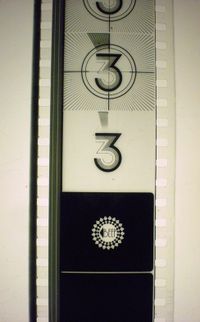
- SMPTE countdown is measured in seconds and will start at the number 8. Academy countdown is measured in feet and will start at the number 12. It's important to know the difference, because you will thread to a different number depending on what type of countdown you're using. Both types should be 12 feet in length if no frames have been removed.
Checking Cues
1 foot = 16 frames, Countdown should be 12 feet. 12 feet = 192 frames (or 8 seconds)
- First, determine if you need to make cues at all. Most archival prints will come with cues already on them, if this is the case use a frame counter to determine if they are correct. Always start from the end of the reel and count backwards from last image. If it’s a fade out, be careful to check where the fadeout ends and the footer begins.
- If you receive a print with no cues on it, (or more likely) receive a print with cues that are incorrect or too close to the last image, you may need to make cues. The SMPTE specification for how to make cues properly is written below. In practice experienced projectionists can do a good changeover with as few as 8 or 10 frames after the changeover cue though you will see the SMPTE spec calls for 18-24. Use your best judgement (and a frame counter) to decide or not you REALLY need to add cues to a print. Better the audience see a frame of black than marking up a print with more cues and handling it more than you need to. If you have to make cues on an archival print use grease pencil only. If it's your own personal print or you have received permission from the archive you may want to make permanent scratched (or scribed) cues. Tape or punch cues are not recommended.
SMPTE - 301 (SMPTE Projection Leader) post-2005 standard: 4 frames of Motor Start Cue ➔172 frames (or 10 feet+12 frames) ➔ 4 frames of Changeover Cue ➔ 18 frames (last image) = total 198 frames
SMPTE - 55 (SMPTE Universal Leader) pre-2005 standard. 4 frames of Motor Start Cue ➔168 frames (or 10 feet + 8 frames) ➔ 4 frames of Changeover Cue ➔ 24 frames (last image) = total 200 frames
How to make grease cues
- WEAR GLOVES and ALWAYS MARK THE BASE SIDE. Mark your changeover and motor cues over 4 frames. Because you have the film running tails to heads on the rewind and you’ll be marking the base side you will have to flip the film over (just a loose twist), so the film is base up. Mark the cues on the side opposite the soundtrack on the top of the frame. Just a short dash from the corner in towards the center a few centimeters will do. As small as you can while still being able to see it.
- You may notice that the length of film between the number you thread to on the countdown and the first image is longer than the amount of footage between cues. That extra footage is to account for the time it takes for the motor to ramp up. Some projector motors take longer to come up to constant speed, in which case you might thread to a lower number to make up for that. Get to know the projector you're working with and run test reels so you can determine the correct number to thread to.
- If a film has been previously cued but say the changeover cue has been spliced off, you may want to count back less than 18 frames to avoid clipping anymore of the film than you have to. I would say 10 at the minimum to avoid having a pretty bad changeover.
- Making cues on a fade out: If there’s no splice to help you, look for when the audio ends and use your best judgement. There should be a lab splice or a splice from the negative that you can count back 172 frames from so you can mark your motor cue. You won't need to make a changeover cue, because the fadeout itself will be your cue. Don't forget to use your ears as sometimes audio will continue after the image fades out!

