| Welcome to Sprocket School! This project is maintained by volunteer editors. Learn more about how this works. |
Splicing

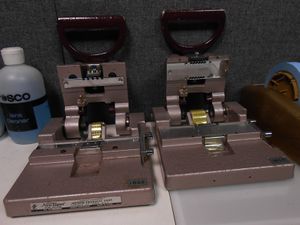
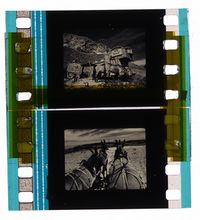
Splicing means joining two pieces of film together using a splicer. In archival projection settings, splices are commonly used to repair or reinforce broken or damaged film encountered during inspection, to attach leader to the heads or tails of a print, or to connect multiple reels of film together (e.g. for a short film program).
Projectionists in an archival exhibition settings should know how and when to splice film, and should know how to recognize and handle preexisting splices on film prints that they may end up projecting.
Types
There are three methods for splicing film together: tape, cement, and ultrasonic. Projectionists in archival settings should use only tape splices.
| Type | Description | Image |
| Tape splices | Made using special splicing tape made to adhere well to film stock of all types. (Do not use regular "Scotch" tape to splice film!) Unlike cement and ultrasonic splices, they are reversible (because the tape can be removed and reapplied). | 
|
| Cement splices | Made using film cement. Creating a cement splice requires the loss of a frame of film, and cannot be undone without cutting the film. Cement splices can be made only on acetate or nitrate film stock. Today, they should be used only in film lab or archive settings. | 
|
| Ultrasonic splices | Made using ultrasonic splicers, which require no tape or cement but instead use ultrasonic vibrations to weld the film together. Ultrasonic splices can only be made on polyester (or "Estar") film base. They cannot be undone without cutting the film, and are used mainly in film labs and archives. | 
|
Making tape splices
When working with archival prints in an exhibition setting:
- Only make tape splices, and make them only with clear archival splicing tape.
- NEVER use cement splices or tapes not meant for splicing such as scotch tape or masking tape!
- Make sure your splicer is clean, aligned, and in good working order before you splice anything important. Check that the edges of each splice are flush with the edges of the film, and that all sprocket holes are fully punched out.
Tape splices will work well on both acetate and polyester film, and splicers and splicing tape are available for every gauge of film.
Checking tape splices
Make sure that no gap between the two pieces of film is visible. The ends of the film should meet perfectly. Gaps can cause the splice to bend at right angles or "hinge" when running through the projector, and the splice may break. A good way to check is the hold the film gently on either side of the splice and bend the film slightly upwards. The film should form a curve. If it makes an angle like a hinge, you may need to redo the splice.
Proper tape splice removal
If you need to remove a tape splice to redo it, be careful not to damage the film while doing so. Starting on the edge of the base side of the film (outside of the picture area), gently lift the edge of the tape with your fingernail and carefully peel it away. Once the tape is off the base side, it should be easy to remove the tape from the emulsion side.
Splicing 8mm & Super 8 film
Guillotine-style tape splicers are available for both 8mm and Super 8 film. "Press-tape" style splicing tape is also available for these gauges. A 16mm splicer can be used to splice 8mm film, but if you do this be careful to punch out all of the holes.
Other kinds of tape
Though only clear archival splicing tape should be used when making new splices, projectionists should be able to recognize other common 20th century splicing tapes:
- Yellow, white, or "zebra tape" was often used when building prints for platter or reels larger than 2k feet so that the splice could be easily identified later when the print was broken down. Yellow tape tends to be thinner, and also very hard to remove when left for long periods on a print.
- Pre-perforated splicing tapes were commonly used in the earliest days of 35mm tape splicing, and are still sometimes used to make repairs. These tapes aren't recommended for regular duty splices.
- The foil "tape" used for making foil automation cues is sometimes applied in a way that resembles a splice.
Unless a splice is likely to interfere with projection, it's best to check it thoroughly for stability and, if stable, leave it in place (unless it is your own print).
Checking cement and ultrasonic splices
Cement and ultrasonic splices should be checked for stability as part of inspection. Ultrasonic splices are rarely a problem, but old cement splices can become weak over time. To check these splices, hold the film gently on either side of the splice and bend the film slightly upwards to form a curve. Examine the curve, checking for gaps or cracks around the edge of the splice. If you detect any gaps in the splice, apply a tape splice over the faulty splice to reinforce.
Where to get tape splicers & splicing tape
- Splicing tape: Christie's Editorial
- Tape, cement, splicers: Urbanski Film
- Splicers: CIR Splicers